guides
How to Use a Benchtop Jointer: A Practical Workflow
Use a benchtop jointer as a reference-making machine, with a clear plan for what comes next. Read and follow your model manual before operating it. This guide explains how to organize the job and assess the result; it is not a substitute for the manual's feeding and safety instructions.
As an Amazon Associate I earn from qualifying purchases. “Check Amazon” links are affiliate links.
A relevant product to inspect
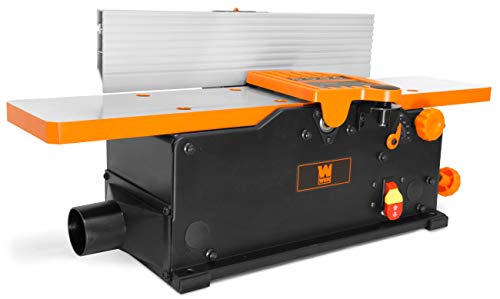
Check exact model, included equipment and current seller details.
Check AmazonStart with the finished part
Write down the finished length, width and thickness, then measure the rough blank. The difference is your material allowance. A board that needs extensive flattening may not contain the finished part you intended, even when it fits the cutterhead. Make that decision before repeatedly cutting it thinner. Label the part and decide which surface you intend to establish first. This simple preparation prevents confusion when several similar pieces move between the jointer, planer and saw.
Inspect the machine and the material
The job needs both suitable stock and a correctly assembled machine. Consult the manual for the pre-use inspection, protective equipment, extraction, mounting, guards and approved push blocks. Inspect lumber for foreign objects, unstable defects and dimensions outside the published operating envelope. Previously used timber deserves particular scrutiny. If you cannot establish that a piece is suitable, do not treat the first pass as a test of whether the cutterhead can tolerate it.
Prepare the first reference face
The purpose of face jointing is a stable reference for subsequent operations. Inspect the board away from the cutterhead using a straightedge and, where useful, winding sticks. Decide whether the distortion is manageable or whether different stock would preserve more usable thickness. During cutting, use the manufacturer's illustrated handling sequence and keep the guard working. Avoid inventing a new hand transfer from a short online description. If you are unfamiliar with the operation, obtain competent instruction first.
Check the complete product offer
Affiliate link. Confirm the version, specifications and included accessories before purchase.
Check AmazonEstablish the reference edge
Once a suitable reference face exists, identify it clearly so the correct face registers against the fence for edge preparation. Verify the intended fence angle independently of a printed scale. After the operation, check the relationship between face and edge at more than one position. A square result at the leading end alone does not establish a square edge along the board. This is an inspection task to perform with the workpiece off the machine, after cutting has stopped.
Move through the remaining operations
Preserve your reference marks through thicknessing and sizing. A clear face mark and edge mark help you avoid changing references accidentally between machines. Check thickness allowance before another cleanup pass, especially on parts that must match a set. When one board loses substantially more material than the rest, decide whether to resize the set, change that part or select replacement stock. Continuing automatically can turn a minor milling problem into an assembly problem that is harder to diagnose.
Record a useful baseline
For each unfamiliar batch, note the species, rough dimensions, starting distortion and final flatness and squareness. Those observations tell you whether the process preserved enough material for the part; a pass count alone does not. No universal feed speed follows from a successful result on one board. If suitable stock repeatedly develops the same defect, stop using project parts for diagnosis and identify the symptom, such as localized end snipe. Disconnect power before inspection or adjustment, keeping maintenance separate from cutting.
For a project that later needs broad-face sanding, compare drum sanders and their stock-capacity limits as a separate finishing purchase. Establish the required references and dimensions first; a sanding machine is not a shortcut for correcting every twisted blank or completing the jointing sequence.
Questions, answered
Which surface should I joint first?
For a conventional squaring workflow, establish a suitable reference face before the edge that registers against it. Follow your machine manual and the requirements of the subsequent operations.
How many passes should I take?
There is no universal count. Inspect progress and remaining material allowance, use cuts permitted by the manual, and stop when the reference is established or the blank cannot meet the project dimensions.
Can I use bare hands instead of push blocks?
Use the guarding and push-block procedures required by your specific manual. Do not substitute an improvised handling method for the manufacturer's instructions.